Proxmox is a great virtualization solution that is far superior to Linux KVM and a fantastic replacement for the very limited and mostly defunct VMWare free edition.
Setting up proxmox
Prepare media
Download the ISO of the community edition and use your favorite tool to write that to a bootable USB stick. Personally, I use BalenaEtcher as it does the job and is very easy to use.
Prepare DNS
It is best to configure any DNS entries for the host in advance: pick an IP and host name that work for your network and add it to your DNS servers. Flush/refresh your DNS across your DNS servers.
Install Proxmox
Plug in your hardware and plug in a network cable. Boot off the USB stick on your new soon-to-be proxmox server. Follow the prompts, set up networking, and let it run. Be sure to remove the USB stick when prompted prior to the final reboot.
Configure Proxmox
There is not a lot of configuration necessary, but they are critical and/or helpful:
Networking
Configure a bonded interface (LACP) if you have multiple interfaces and your switch supports it. I configured two ports on my switch in trunked mode as LACP (802.3ad) and then configured proxmox’s /etc/network/interfaces file to look something like this: cat interfaces auto lo iface lo inet loopback
iface enp1s0 inet manual
auto vmbr0 iface vmbr0 inet static address my.internal.ip.address/24 gateway my.internal.ip.gateway bridge-ports bond0 bridge-stp off bridge-fd 0
Now you can log into proxmox’s UI. https://hostname.your.domainname:8006
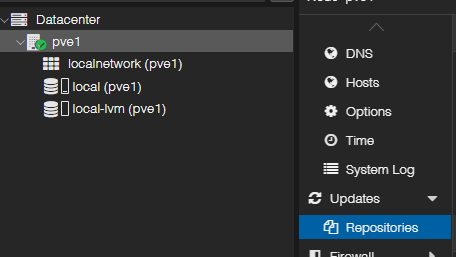
Click on the host, in my case it is pve1 (so not original) and under “Updates”, select “Repositories”
You will want to make a few quick changes:
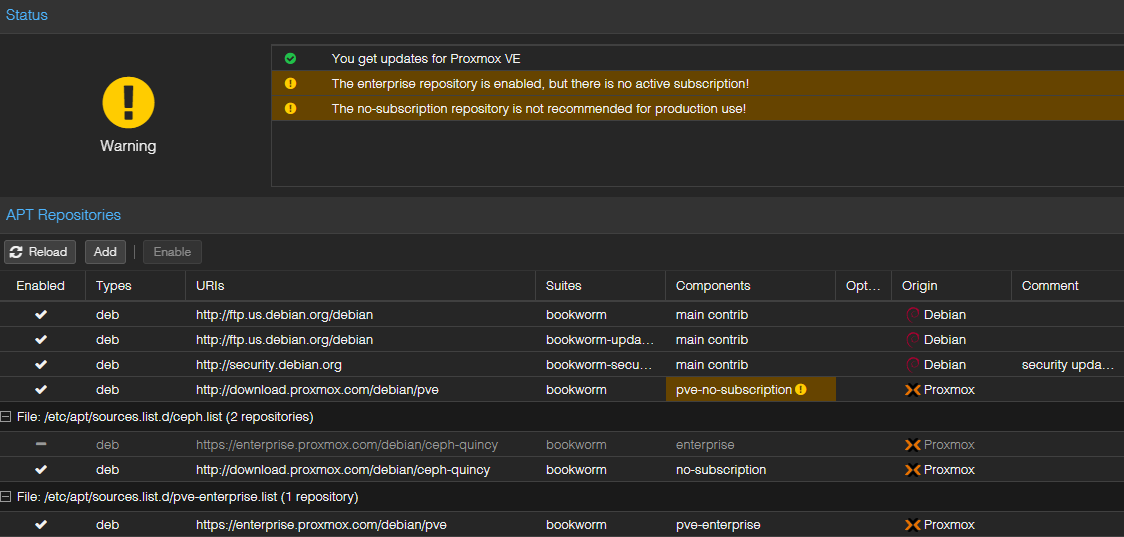
Disable “bookwork” “enterprise”
enable the “bookwork” “pve-no-subscription” repository
Your repositories will look like this:
Now click on “Updates” and click “Upgrade”. Answer “y” to the prompt and let it rip. When complete, reboot the host.
When the system has rebooted, log back in and continue your configuration
Storage
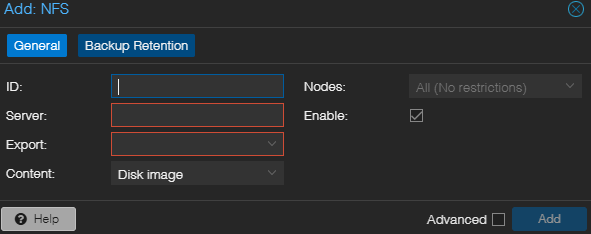
This is the point where you will want to configure your storage. If you have a NAS, you will add the storage by navigating to Datacenter -> Storage. Select “Add”. From the pull down, select “NFS” and complete the form according to your specifications
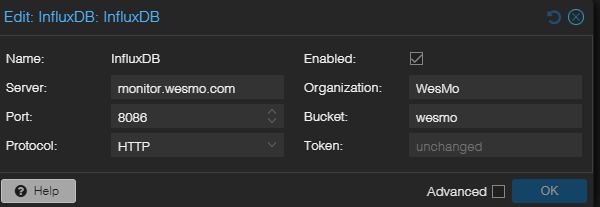
This step is only for those who use Grafana and InfluxDB for monitoring the metrics of the server. Under Datacenter, select the menu item “Metric Server” Click “Add” and select “InfluxDB” Fill out the form according to your specs. Note that you will need to set up an API Token on your influxdb server for this new host.
You’ve moved to XFS volumes and low-and-behold your super simple yet extremely important backup process stopped working. Dig a little and you learn that XFS volumes require their own tooling to do backups at the block level so the old “dump/restore” packages you relied on won’t work.
That is what happened to me.
I do monthly full backups of my personal systems and daily incrementals. On top of that, I do them from a central system and back the other systems up via SSH. It is not a big environment, so this is an easy to maintain system which does disk-to-disk backups complete with compression. It is optimized, quick, and very portable.
I had to tweak my backup tooling ever so slightly to make it use xfsdump with the right flags. It was a bit of a pain to do, but not terrible.
The script does a lot more than that. It will rotate through all of the volumes on the host to be backed up and name the file accordingly, switch between full and incremental backups based upon the date (first sunday of the month, for example), and it creates and maintains a defined (at runtime) number of “month” folders and daily folders. I try to keep it simple considering at the time of a restore you are usually under pressure. The last thing you want to do is scramble to search through a bunch of files and folders. So the naming convention makes it easy: month.0 is the current month, month.1 is last month, and so on, and daily.0 is today, daily.1 is yesterday, and so on. On top of that, the files have their date stamps, so if you are looking for a specific date (the 17th) it is quick to locate.
Now, to restore, I like interactive restores. I find the vast majority of the time, it’s a surgical restore: restore a file or folder.
It is important to remember xfsdump and xfsrestore are sensitive with the ordering of the command line options. For example, xfsrestore did not like combining -i and -f into -if so do not make that assumption.
Social Media started off with such noble aspirations: break down the borders, remove the boundaries and barriers, freedom to talk about anything, turn the tables and get people socializing more, turn those introverts into extroverts, have an open platform to share everything from gossip to news.
Fast forward and what have we learned? Anything unregulated devolves into complete anarchy. The social media giants have learned this the hard way and have been on the reactionary and defensive path ever since with disastrous results.
Remember, Social Media is exactly that: social. It is not journalism. It is more akin to “gossip” yet on a global scale.
It is as if your neighbor had some juicy news about someone cheating and told everyone on the street. Yet the street has 7 billion people on it. That gossip could be baseless or based upon something. Who knows? No one really. Even the person spreading the gossip might not even be who you think they are. There is a really good chance the person posting the juicy “news” is not even from your own country.
This opened the doors for conspiracy theorists to have a platform to be heard. Then the extremists. Followed by, of course, the trolls. And finally the purposeful manipulation of information by groups (governments, organizations, groups) with their individual and sometimes aligned agendas. Add that all together with a large population of users who cannot see the difference between the “gossip” of social media and the “news” and it is no surprise the world is becoming more divisive and fractured.
Twitter in particular attempted to begin to provide editorship over the content being posted. Rather than use the word “editorship”, since that would put them in the realm of a legitimate media organization subject to some stricter rules in the US, let us use the word “censorship.” Yes, Twitter will hide or delete content it deems as bad against criteria they have developed and manage subjectively.
Hate Speech. A meaningless phrase that implies meaning.
That phrase is entirely subjective and baseless. If one were to say they do not like lead pencils, another could see it as a hate of lead pencils. It is a made up phrase that is entirely subjective to the individual, yet the phrase resonates with so many people and has become a weaponized phrase.
What is worse is that Social Media giants have recognized their influential power and appear to actively leveraging that power by “choosing a side”: leaning more heavily on stifling one group of individuals while leaning more heavily on propping up another group. Now they are not only editing and censoring, but they are actively crafting the culture of their platform. This activity breeds even more gossip about an agenda. Even more frightening is, whether collectively or coincidentally independently, the Social Media giants are taking similar actions as if they were coordinating with one another.
With the events in the US unfolding as protests turned to riots in May of 2020, the situation has gotten very dark. Twitter specifically has actively allowed their very own definition of “hate speech” to remain which call for violence against a specific group of people: white / Caucasian. Examples of which can be found here. These are disturbing on the gossip platform and extremists like this now have a platform to spout their hate from.
One might excuse it away as “We cannot monitor it all”, but when the platform is actively supporting violence and anarchy it cannot be overlooked.
Those who run Twitter have chosen a side for their community.